A couple of months ago I’d posted to the main astromech.net forum about modifying the JAG center foot to include a more pronounced skirt at the bottom. At first not everyone quite understood what I wanted to achieve.
Here’s some reference shot of the Uber R2 that may help


And here’s a screen cap from ANH with an even bigger skirt on the center foot

What set me down this path was seeing my droid next to Gerard’s (his is on the left). Note the difference in the center foot?

I think weathering helps define the foot as well, and to stops the white making the foot look more like a blank floating triangle/wedge.
This is Gerard’s raw Weaver foot
After a lot of debate most people finally got what I was trying to say, including JAG who may include the mod on the next run of feet. But I thought I’d see if I could modify my current foot in the meantime.
I created an little frame out of angled aluminum (1/16″, 1/2″x 3/4″), and the plan was to pop rivet it onto the existing 3/4″ lip around the foot.

It wasn’t perfect and I knew I wouldn’t be able to get the corners angled correctly, but was hoping to blend in the frame using bond or something.
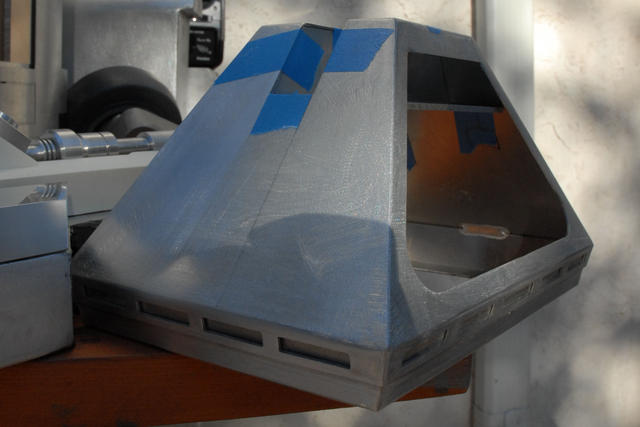
Here’s the foot with the temporary skirt. A little too tall I think and I’m not crazy about the corners being straight as opposed to angled, so I’ve decide to see if I can find someone to lend me a welding ring to make a more accurate skirt/frame.

I wanted to report that the new method of attaching the JAG legs and ankles worked. I didn’t have any problem with screws working loose while at WonderCon, unlike at C4, where I had to constantly tighten them up – and had two screws sheer on me.
Back in December of last year I’d decided to use pan head screws with a combination of fender and lock washers , instead of the recommended countersunk machine screws.

They’re do stand out a little but, but once I’d painted them up nobody really noticed them.

Related Posts:
Posted by Chris on March 30th, 2008 in Legs | Comments Off on Leg/Ankle Screw Update
Tags: ankle, JAG, washers
Do yourself a huge favor and throw away the bolts that come with most of the ankle detail parts. It’s virtually impossible to quickly assemble the ankle with them. I have small hands, but even I had a problem getting in there. Instead use hex head cap bolts in place of the Philip heads.

Like an idiot late one night I suffered through putting my ankles together before C4 with the original bolts. I even bought one of those fancy right angled screwdrivers – it did the job but it’s still incredible frustrating to use. It’s funny how sometimes you’re so close to a problem that you’ll go down the totally wrong and longer path for a solution. In this case the right bolts and a small wrench did the job so much better.
I’ve also swapped out a bunch of bolts that came with the JAG drive system. The originals work fine, but again it’s hard to get into the tight space to adjust things.
Here’s another retroactive post about something I worked on a few months ago.
One of the challenges is passing the drive wires that goes from the ankle into the foot shell. Some people use the totally hidden/invisible method where slots are cut in the side of the ankle and foot shell very close to the bolt. Here’s an example of Wayne O’s setup using this method.

Space is tight and things have to be perfectly aligned or you run the risk of chopping the wires when the ankle pivots. It’s also virtually impossible to add grommets so over time my worry is that the wire may wear. edit 9/7/07 – Wayne just informed me that his setup above has been working fine for over a year and half without any problems or wear and tear.
I was on a time crunch and not sure if I was up to marking and cutting such precise slots, so I opted for the more conventional method of drilling holes in the foot shell just behind the ankle and corresponding hole in bottom of the ankle.
My wires are pretty think and by my calculation I needed a chunky grommet, but I couldn’t find anything suitable so had to improvise. Instead I used a short length of opaque tubing which passes through from the ankle into the leg. Not only does it protecting the wires it also hide them.

This is the inside of the Ankle

And the Foot Shell

Tube passing from the ankle into the foot shell


I also used the same hose in the top of the legs/shoulder to protect the wire as it passes into the body.
Made a start on the Center Leg Mount last night. They’re based on a design by Atomic Pickle/JAG.
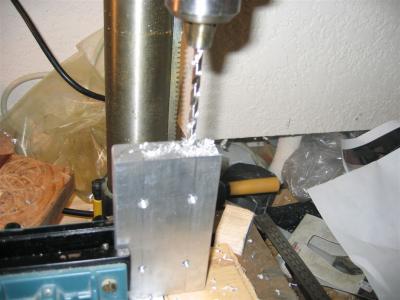
Started off with some aluminum plate and a nice block of 3/4″

I didn’t have access to a mill, so I rough cut the parts. I then sanded the block down on my bench sander till it fit and marked off the holes ready for cutting and tapping.
I’ll probably still go back at some point and mill out the center to reduce the weight.

Block inserted in leg


I still need to get some spacers to go between the plate and the frame.

More photos
Posted by Chris on April 27th, 2007 in Legs | Comments Off on Center Leg Mount Plate/Block
Tags: ankle, atomic pickle


